Wednesday, March 10, 2010

Signs of Spring

Look what I found, peeking out of the ground beside my house!

(I actually hate these things (hence the obvious lack of care around them) - they're tiger lilies, and the place is overrun with them . But still. SPRING!)

Buds on the lilac bushes, and a brilliant blue sky.


Birds everywhere (all of whom managed to elude my camera)

And yes, even the inevitable garbage in the brook, waiting for me to get out there and do some Spring Cleaning (remember garbage day last year?).


Even though the yard actually looks pretty desolate right now.


Even though I know that we probably haven't seen the last of the snow, yet.
Even though it's technically still Winter...

Spring is definitely on its way!

Sunday, March 7, 2010

Fine Dining

Ok, here we go. If you've been following the progress in my dining room in the last couple of posts, today's the big day. Here is what my dining room looked like before I moved in:


The door on the left is a small closet (yes, in the dining room), lined with vintage wallpaper. I'd show it to you but it's currently busy serving other customers fulfilling its storage duties and is not feeling very photogenic.

As with EVERY OTHER WALL IN MY HOUSE, the walls were beige. There's nothing wrong with beige, but believe me, living in a beige bubble eventually starts to wear on a person!

And that light fixture is woefully inadequate. But don't worry, I have some ideas for sprucing it up to eventually use it somewhere more appropriate.

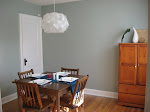
And finally, the moment we've all been waiting for... the 'finished' room:


I should note (before someone who knows me comments below!) that I very rarely actually use this room as a dining room. It's usually my 'office', and that armoire in the corner is full of office-y things like my printer and office supplies. So I set the table just for you - it would hardly do to show you a picture of it with my laptop on the table, now would it?! :)

As I mentioned the other day, after the painting was done I was ready to swap out the old, undersized light fixture. This pendant is something I made a couple of years ago, it used to hang in the dining room of my last apartment:


I originally used a lamp kit to light it, but now that I'm in a house, I hard-wired it in.

I first found the idea for this light via ReadyMade, but the instructions are on Instructables. The light is actually a Danish design from the early '70s called the IQ Light . (If you go there and look at all the variations, I think mine was the 80 piece version - so if you're thinking of making one of your very own, be prepared for blisters!!)

That's it for now. I still have a few other projects lined up for this room (a piece of furniture I want to make over to use as a sideboard, some desperately-needed art/mirror/whatever for all those bare walls...). And I know there are a lot of shades of wood going on here, but I'm working on it! For one thing, the table and chairs have had many many lives in many different places, and the chairs at the very least are coming to the end of their lifespan, so I may have to do something about that one of these days.


Any thoughts? Comments on the colour? Suggestions for those bare walls?
Friday, March 5, 2010

Progress - and a quick peek

Hello! It's been awhile. You'll have to excuse my absence, but ever since my last post, my days have been consumed with addressing the problem I found there. I spent the entire month of February, it seems, with a scraper in my hand. Eventually, those walls I showed you ended up like this:


Hallelujah. Maybe I'm crazy. Maybe I don't know what I'm doing. Probably a little of both. But once the scraping began, there was no easy way to end it. I definitely didn't want to just patch over the problem and get on with the painting, because I didn't want the new paint to peel right off. So I carefully scraped the two walls back to the bare plaster, to start with a 'clean slate' (these two are exterior walls, the other two dining room walls didn't have the same issues).

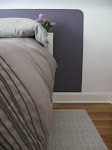
And now, as of yesterday, the painting is complete! Here's a sneak peek of the colour:


I think it looks pretty grey in this pic, but it's actually a greyish green by Behr called Verdigris. I'm about to replace the light fixture, so stay tuned for full room pics tomorrow (provided the light swapping goes off without a hitch!).

Sunday, January 31, 2010

Un-Painting

As I recently mentioned, I've had the urge lately to get painting. The boring beige that covers most of my walls has worn out its welcome.

I thought I'd start with my dining room(/office), so I picked out a colour. It's a small room. 'It'll be easy', I thought. 'A quick project'. Right.

To start things off, I wanted to fill some of the nail holes that the last paint job had just painted right over. So I started in one corner. 'Hmmm, what's this bubble?' I wondered. And then, all of a sudden, I was looking at bare plaster, as years and years worth of paint layers came sliding off the wall in large sheets. This is what de-lamination looks like, boys and girls:

(notice the stack of paint 'sheets' piled on the window sill)

So I turned to my trusty friend Google for advice, and together (along with some further detective work - AKA scraping) we decided that it's most likely the result of (hopefully old) water damage, as evidenced by the water stains on the plaster, and some mildew spots in the area below the window sill. Plus the cracking/peeling problem I first noticed seems to just be mainly around this window, which is also directly underneath where the porch roof meets the wall (remember my fun flashing adventure?).

Anyway, to tackle it properly, I've first got to get all the loose bits off (basically scraping until I'm out past the edge of the water marks). So I decided to make a game of it, a little something I like to call 'who can carve the biggest slice?' And guess what? - I won! Fun times, let me tell you.


It's a good thing I was the type of kid who loved peeling sunburns.

(And for those of you keeping score at home, under the beige paint I found dark red, more beige, pea soup green, emerald green, and peacock blue. None of which are going back on the walls once I get this project back on track)

At this point I think the next step is just to clean it up, patch with wall compound, and then prime it all (and hope for the best). And I'm REALLY hoping it's just this section of wall that needs so much work...

So much for a 'quick, fun project'.

:S

Wednesday, January 27, 2010

Painting Puzzle

In case anyone thought that no posts meant I've just been sitting around twiddling my thumbs, here's what my living room looked like a few days ago:


What you see here is more than 300 feet of beautiful baseboard and casing (and all the other requisite bits and pieces) that my dad bought for his place. I managed to fit them all into my living room so I could put a couple coats of paint on them, figuring I had more unused space (and unlike dad, no four-legged friends to disturb them!) to get the job done. I also thought it would be easier to paint them before he installed them on his freshly-painted walls. (I still think I was right about that one!)

Speaking of those walls, ever since helping him get them painted, I've had the itch... I think it's time I said goodbye to some more of the boring beige at my place...

Friday, January 15, 2010

Organization Makes Me Giddy

There's one room in my house that I end up spending most of my time in, and I'm pretty sure I haven't posted any pictures of it yet (it's late, or I'd check). It's my studio, it's the largest bedroom upstairs, and if you're wondering what it is that I DO in there, have a look over yonder
<-------

Anyway, it's a work-in-progress (aren't they all!?), so I'm not ready to show off the whole thing yet, but I couldn't wait to show my latest bit of organizing/thrifting/DIY awesomeness. But first, let's get the 'Before' mess over with quickly, bandaid-style:


Ugh. Ok, that's all you're getting, and I insist you forget you ever saw that. My propensity for making (or attempting to make) practically everything, means I have A LOT of stuff. And up until recently, no place to put it all.


Now check this out! The two white bookshelves were an absolute SCORE from Kijiji (I showed up expecting to buy just one, it turned out that they had two after all, and I got the two of them for just the $15 I'd planned to pay for only one).


As a side note, for those of you in the US: do you have Kijiji? I only ever see Americans talk about Craigslist...

Anyway, they were in great shape, but since I'm apparently not one to be happy with plain white shelves, I lined the backs of them in this cool 'formica'-like stuff that looks like bamboo (formica=weird, I know. But it was relatively cheap, easy to work with, and I love the look of it!):

(and no, I don't typically store placemats and stemware in my studio. I use these random objects as photo props, and my business cards are just in the glass because I think they look cool)


The fun stripe-y pegboard is super functional, but it's also practical: shelves all the way along that wall would've made for a tight squeeze trying to walk around my extra large work surface that's almost as wide as the room. This way I still get the storage, but it doesn't take up any floor space. (The stripes weren't for function, though. Just like the bamboo stuff lining the shelves, they're there because I think they make it more interesting, and because I can't leave well enough alone.)

Anyway, that's it for now. Maybe next time I'll show you how I store my ridiculous fabric stash. :)

Saturday, January 9, 2010

What a Pair!

In my quest to furnish this house (a quest which is far from over), I happened upon these at a thrift store:
Someone had (obviously) already tried to re-upholster them, but the result was pretty lumpy and, well, not pretty. But at $8 each, I figured I (and some lovely fabric) could give them a new life.


Not bad, eh?! The fabric was a remnant from a favourite fabric store in Toronto, and I was lucky to have juuuuuust enough to do the two of them. After replacing the foam on the seats and recovering, the chairs ended up costing about $15 each. Now if only the place where I want to put them wasn't over-run with other projects, I could show you them in their new 'home' rather than lined up against the wall, 'jail booking photo'-style. Sigh.

Sunday, January 3, 2010

Snow fun? No fun.

What did I do today? I shovelled. This:


For the second day in a row.

I can barely move my arms. And winter has barely begun!

Thursday, December 31, 2009

reflecting

2009. A year full of highs and lows, it was the very best of times, and the worst, often all at once.

I bought a house, (started a blog!), turned thirty, and lost a job.
spoke up. kept quiet.
laughed. cried.
succeeded. failed. persevered.
found the silver lining.

faced fears. conquered obstacles. embraced change.

Wednesday, December 23, 2009

Decking the Halls

Sorry for going AWOL for a while there, but work on the house has had to be put on hold for a bit in the lead up to the holidays. I've spent most of the past few weeks in my studio doing my Christmas 'making' (definitely not to be confused with Christmas baking) - both gifts to give and several custom sewing orders for others to give to their family and friends. One upside(?) is that it's given me lots of time to think about all the changes I want to make to that room, so watch for that in the new year!

Anyway, for now I thought I'd share a few pics of how I've decorated for my first Christmas in the house...

I got my craft on one day and made some mod paper ornaments to hang in the front window. (An idea borrowed from here.)


Inspired by this, here's a wreath I made as a gift for someone. Someone I don't think reads this blog. I guess we'll see! :) I love it, and am tempted to keep it for myself, but I'll just have to make another one when I have a bit more free time!


In lieu of the traditional garland on my very narrow staircase, I opted for a simple ribbon:


And finally, the tree. Due to general busy-ness and the as yet un-organized/un-decorated state of my living room, I contemplated not putting it up this year. But I'm glad I did - nothing beats the light of a Christmas tree! (big thanks to mish (the ribbon guru) for all of her tree-decorating assistance - ribbon-related and otherwise!).


And a special gift from these guys to commemorate this milestone, which I thought was very, very sweet of them :)


(reads: First Christmas in the New Home, 2009)

Happy Holidays!