Monday, August 9, 2010

sm-ART

Now, I like a nice expanse of blank wall as much as the next person, but it's getting a little ridiculous around here.  Only one room in my entire house has anything hanging on the wall, so I thought I'd better start doing something about it.  Here comes my favourite DIY (and cheap!) wall art...


First I purchased and assembled stretcher bars (from an art supply store) in the dimensions to best fit my space (this is a great way to get a custom-sized piece for that hard-to-fit area!).

Then I found a piece of fabric in a bold, modern print (the bolder the better, if you want fabric to function as art), and simply stretched it tight over the stretcher frame:


Really bold prints can be tough to find, but I'm a huge fan of Marimekko prints, so I immediately knew that's what I wanted to use and just had to wait to find it for the right price (like lots of desiger fabrics, Marimekko pieces can be a bit pricey).

*The number one rule of thrift, (in my opinion, anyway!) is patience.  I searched places like Ebay and Etsy for a couple of months before I eventually found this print (called 'Tuuli' or wind) as a remnant, for a great price!  Total cost for this piece of 'art' was about $30 (fabric + stretcher bars), and it's 24"x36"!


It's hanging in my upstairs hallway, right above the stairs.  I love how the grey echoes the colours of my bedroom.  And I believe this is also the first time I've posted pics of the new paint in the hallway (upstairs + down), but I'll have more on that later!

For one last take on the 'fabric as art' idea, some of you may remember catching a glimpse of the other Marimekko print I have, which is currently hanging in my kitchen:


This print is called 'Unikko', and it's travelled with me for a few years now.  Not sure if it'll stay in the kitchen, but for right now it's one of the few things I like about that room, so it stays! :)

Monday, July 26, 2010

Coming Soon!

Something very exciting will be coming soon to my little corner of the blog world...
I've been contacted by CSN Stores to do a review of one of their products!
I must've been living under a rock, because up until a couple months ago, I wasn't familiar with all they have to offer. Did you know that they sell everything from dining room furniture to vessel sinks and fire pits?  They even sell tools for when you want to get your DIY groove on.
In fact, they have over 200 stores!
And, of course, the all-important part - they ship to Canada!
I've heard great things about their customer service, and love the huge selection they have available, so I'm very excited to receive the item I've picked out.  Stay tuned!

Wednesday, June 16, 2010

One Last Thing...

I know I said my bedroom was (finally) finished, but there was one last detail I wanted to take care of.  There wasn't much furniture in the room (just the bed), so I wanted to add a small chair (even if it's just a place to pile clothes on, let's be honest!).

I picked up this 'lovely' little number at a Salvation Army thrift store for just $4.99(!):


 Add a bit of fabric, a bit of sewing, and a staple gun, and...


 Still loving the layers of colour!  :)

Tuesday, June 1, 2010

Useless Boobs and a DIY Ceiling Medallion

Forgive me, but I happen to have a particularly strong hatred toward boob lights.  Whether it's their generic brassiness, their overwhelming prevalence (my house has lots of them, and I bet yours does, too), or that silly nipple, I don't know.  But I can't stand them, and I'm on a mission to eradicate my house of them, one by one.  (Current count: 2 down, 4 to go)

image of standard brass ceiling fixture that looks like a woman's breast

OK, rant over.  You may recall seeing the brand new light fixture in my bedroom makeover the other day.  Well, when I first replaced the original fixture (no, it wasn't a 'boob' this time), I ran into a bit of a problem:

close up detail image of gap around new smaller light fixture on ceiling

There was an unsightly gap around the base of the new fixture, because it wasn't as wide as the old one.  I immediately thought that a ceiling medallion was the answer, but since this makeover was on a very tight budget, I didn't rush to shell out the $30-$40 it'd cost for a (small) new one.  I figured there had to be some way to make my own, so I started searching online and looking in thrift stores for something I could use.
Then one day the proverbial 'lightbulb' went on.  Being of the 'waste not, want not' mentality, I figured, why not use one of those useless boob lights I've been amassing in my bid to rid my house of them?  Perfect!
 
image of interior of flushmount boob light fixture

I stripped the 'guts' out of it,

image of brass boob light fixture with lighting components removed


removed the socket that the bulb goes into, and the foil lining, and used a few coats of leftover white ceiling paint to get rid of the brass look.

DIY drum pendant light with DIY ceiling medallion made from boob light

Et voila!  No more gap around the fixture, and the 'boob' has regained its usefulness and been kept out of the landfill.  Total cost: $0 - my favourite kind of DIY!

alternative image of DIY pendant light and ceiling medallion from directly below lightbulb

Thursday, May 27, 2010

Bedroom Makeover - Final

At long last, the bedroom makeover is finished. Well, for now, at least! Here's what I started with:

blah bedroom before picture


Pretty sad, right? And after a little painting, some sewing, some more sewing, and a few more tweaks, here's how it looks today:

updated bedroom after picture

Ahh, that's better!  My goal was to make the bedroom a calm and relaxing 'nest' with shades of grey and mauve.  I tried to use enough layers and textures to keep it cozy and interesting.
 
The most recent additions are the light fixture, which went from this old-fashioned 'beauty'

image of old style square glass ceiling light fixture


to this simple drum pendant

new DIY grey drum pendant light fixture


and the purple paint on the wall behind the bed.
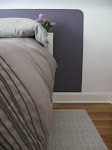
I felt like the bed looked odd floating against the white ceiling/wall, and the room was just lacking somehow.  A bit of painters' tape and a sample-sized can of 'Grey Amethyst' were just what it needed to wake things up!

midway picture of bedroom with painted walls, new duvet cover and plain white sloped wall behind headboard

image of purple painted rectangle with rounded corners behind headboard

My vintage white bookshelf headboard virtually disappears behind the pillows, so the purple on the wall acts as a sort of painted headboard, giving the bed more presence.  It also addresses the whole 'can't paint the wall because it's actually the ceiling' dilemma.

close up detailed picture of rounded corner on painted headboard

And it looks good with the grey and white 'Moroccan' cotton rug I found at the grocery store (of all places!)

Finally, what girl can resist a few feminine details like sequins and fresh flowers? :)


detail picture of small vase of purple lilacs against dark purple painted headboard

detail image of dark grey sequined pillow against pale grey bedding

So there you have it.  My complete bedroom makeover on the (very, very) cheap!  Actual spend, after using various gift cards I'd hoarded(!), was right around $100.

What do you think?  My favourite part, impact-wise, is the purple wall.  How about you?  What would you do differently?

Saturday, May 1, 2010

Happy House-iversary

O happy day, today marks my first house-iversary - I officially became a homeowner one year ago today.  I thought I would invite you to take a little sentimental journey with me, to a year ago, to tell you about how my house and I first got to know each other.  I'll warn you: I'm not known for being particularly brief, but I think it's worth sharing.  :)

Thirteen months ago, I (for unexciting reasons I won't get into here) found myself needing to find a house relatively quickly.  A friend recommended a realtor, I told him what I was looking for, and asked to see whatever was available in my (admittedly low) price range.  (As a first-timer, I wanted a good sense of what that would buy me in my area, so I would know a good house when I saw it) Anyway, as it turned out, the search wouldn't take long - there were only about three.  And this is not because I was being picky.  Unless you consider 'unwilling to spend more than the bank would allow' or 'unwilling to buy an uninhabitable house' being picky.  Anyway, lucky for me, this house was number three (of three!), and I knew right away that it was 'The One'.  What was REALLY lucky for me was that I didn't feel like I was forced to 'settle' for this house.  I love it.  I loved it right from the start.

What followed was a crazy hectic two weeks - yep, closing day was a mere two weeks after the day I first laid eyes on my house, and only twelve days after my offer was officially accepted (these things are possible if (a) you are certifiably insane, and (b) the house is vacant).

A year ago today, I woke up super-early in the morning, super-duper excited.  It was CLOSING DAY.  I couldn't get that song 'Closing Time' out of my head.  Not that the rest of the lyrics are relevant, but who cares?!  I was excited.

All through the previous, hectic days, through all the lawyer and bank appointments, the house inspection, etc., I kept waiting for it all to feel 'real'.  Everything was happening so fast, reality hadn't caught up with me yet.  But I figured that once I held that key in my hand, that would be the moment.

I went to the house that morning for the final walkthrough with my realtor.  Luckily, he'd arrived first, because what greeted us was a bit of a shocker (major understatement).  The night before, hoodlums had thrown rocks through five of the house's (brand new) windows, kicked in the basement door, and left the other doors swinging in the wind.


We surveyed the damage, and before getting on the phone to start handling things, my realtor handed me the key, saying "here, I guess this is yours". So much for my 'moment'.

Now, in hindsight, it could've been worse, right?  They couldn've set fire to the place, or kicked holes in the walls or something.  Or hey, they could've done it the next day, after I took possession, and my insurance would've been responsible for the damage.  But nevertheless, it was still pretty darn traumatic.

The rest of the day was an emotional rollercoaster, but I was determined that this house was mine, and I wasn't letting some stupid hoodlums ruin MY day.  This was my eventual decision, anyway, after multiple phone conversations, freak outs, and a lot of tears!  (I live alone here, people, and the house is well back from the street.  I think my fear was justified!)

The previous owner called some idiots to come clean up all the glass, board up the windows and secure the doors (I say idiots because they drove massive screws through the solid wood door with the ONLY working lock - you know, the one my key was for? - and left one window uncovered with rain blowing in, and the basement door wide open - yeah, that'd be the one the massive screws should've been used for.  Come on morons, the house is pretty small.  How'd you manage to screw that up???)

Since my moving 'crew' (thanks, guys!) was scheduled for the next day, that night I just moved a few things in with my dad's help.  Included in that first load was a bed, because there was no way I was leaving my house a vacant target for the hoodlums that night.  It was mine, dammit!  

I spent the first night on a mattress on the floor (oops, forgot the bedrails in all the 'excitement'!), with a hammer by my pillow (hey, it was all I had!), and every light in the place blazing.  A memorable day right to the end, though not in the way I'd hoped.

 no, this is not a crack house

Anyway, so I moved in, life started to fall into a routine, etc. etc.  Until, a week later, the hoodlums came back while I was at work and smashed another window and kicked in the basement door, this time tearing it completely off its hinges.  Yeah, that day kind of freaked me out, too.  Welcome to the neighbourhood!  (I should probably clarify at this point that despite how this sounds, I DO NOT live in the ghetto.  This is an otherwise pretty quiet suburban street.  Any neighbours I've talked to haven't heard of anything else like this happening around here.)

So yeah, this time it was on me to replace the window and door.  Again, I'm grateful that it wasn't worse.  The laptop I'm typing on right now?  Was totally sitting out on the dining room table when they broke in the second time.  But nothing was taken, and I don't even think they came upstairs.  Still freaked me out, though!

I spent my entire first month of home-ownership living in a dark, boarded up house, with the wind whistling through the broken windows.  As soon as the final window was replaced, I had the alarm system installed (the first of many unplanned-for expenses, I've learned).  I now sleep much better, and the hammer is back in the tool box where it belongs!

one of many boxes of glass

It was more than six months before I felt like I could safely walk around inside without shoes on because of all the glass (apologies again to the guests I 'yelled' at to keep their shoes on!).  I still occasionally find the odd shard.  And I'm not sure I'll ever want to walk in the yard barefoot, because it's a lot harder to spot it out there!

The hoodlums are still around, but haven't caused any more trouble that I know of.  They still occasionally run through my yard (and yes, at least one time the police were in pursuit...), but I make sure to let them know I'm here, and that I'm watching. Turns out, we homeowners are a rather proprietary bunch.  I care, because it's mine.

So tonight, I'm toasting my first house-iversary with an adult beverage, and thinking that, all in all, it's been a pretty good year.  And, while I type this, as their own special contribution to the celebration, the hoodlums are setting off fireworks in the schoolyard across the street.

How sweet of them to remember.
 

Tuesday, April 27, 2010

Bedroom - Part 3

So, at this point I'm just hoping this isn't part three of 12 or 15...  This 'makeover' is definitely taking longer to finish than I'd hoped!

Anyway, just to show that I'm still working on it, here's the latest completed piece:


I finished the roman blind!  I love this fabric, and how it livens things up a bit.  Also love how the thick old window frame makes it look like a piece of framed art.


And that it does a great job blocking out the light (maybe too great?  I'm occasionally finding it a little too easy to sleep in now!)

Wednesday, April 7, 2010

Garbage Day (2nd Annual?)

Hey, look what I just found in the woods and brook beside my house:


Ok, ok, I know - another boring post about garbage.  But here's my point:  People who litter are selfish and lazy.  Please don't be one of them.

Friday, April 2, 2010

Bedroom - Part 2

Last time around, I showed you the room I started with, and the new paint colour.  What I didn't show you was the VERY first update I made - the mattress.  It was a long time coming, but I finally bit the bullet a couple months ago and splurged on a super plush mattress.  I now think of it as my princess bed, because I feel like a princess every time I sleep in it (even now, months later!).  The cushiness just feels like luxury - definitely a worthwhile splurge!

Anyway, now it's time to add in some of the details.  What I wanted for this room was a warm and cozy retreat.  Layers of soft grays, taupes, and purple shades, with some modern and girly touches to balance things out (stay tuned for those).

First up, I needed bedding to go with the new colour scheme:


I couldn't find a duvet cover that I liked, in the right colour, for less that $70 (and most were more than that).  Since this bedroom makeover was on a serious budget (especially after the mattress splurge!), that just wouldn't do.  I made this one out of a couple of sheets, for about $15, so that fit the bill!


Oh, and check out the cute lamp I found, that had all the right colours on the shade:


Not only that, but it only cost me $5 (after using a gift card), AND it was short enough to fit under the slope of the ceiling - a tall order, as it turns out! :)

Still to come:  replacing the overhead light fixture, a little window dressing, and a small chair, perhaps?

Wednesday, March 17, 2010

Bedroom - Part 1

The transformative power of paint in the dining room has led me to move on to the next room on my 'hit list': the bedroom

Again with the blah beige :(

But now that step one in the makeover process has been completed...


Bye bye beige! And as with the dining room, I think the new colour on the walls makes the floor and mouldings look pretty spectacular. LOVE it.

Part 2 coming soon!