Showing posts with label craft. Show all posts

Sunday, May 1, 2011

2nd House-iversary

I couldn't let today pass without formally marking the occasion - it's my second house-iversary!  It amazes me how quickly two years have flown by. 

I haven't been able to get much work done on the house lately (both time and money being in short supply), but I wanted to celebrate today's milestone with a little project.


This is the 'infamous' key I told you about a year ago, on my first house-iversary.  I've held onto it (despite changing the locks right after I moved in), because for me it's symbolic - not just of buying the house in the first place, but of some of the obstacles I had to overcome along the way.

So today I mounted it in this frame (sans glass, and sporting a new coat of black paint), which I plan to eventually include in a gallery wall of frames (you know, some day...).  But for now, at least the key has found a proper home.

Friday, April 2, 2010

Bedroom - Part 2

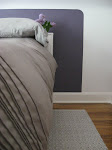
Last time around, I showed you the room I started with, and the new paint colour.  What I didn't show you was the VERY first update I made - the mattress.  It was a long time coming, but I finally bit the bullet a couple months ago and splurged on a super plush mattress.  I now think of it as my princess bed, because I feel like a princess every time I sleep in it (even now, months later!).  The cushiness just feels like luxury - definitely a worthwhile splurge!

Anyway, now it's time to add in some of the details.  What I wanted for this room was a warm and cozy retreat.  Layers of soft grays, taupes, and purple shades, with some modern and girly touches to balance things out (stay tuned for those).

First up, I needed bedding to go with the new colour scheme:


I couldn't find a duvet cover that I liked, in the right colour, for less that $70 (and most were more than that).  Since this bedroom makeover was on a serious budget (especially after the mattress splurge!), that just wouldn't do.  I made this one out of a couple of sheets, for about $15, so that fit the bill!


Oh, and check out the cute lamp I found, that had all the right colours on the shade:


Not only that, but it only cost me $5 (after using a gift card), AND it was short enough to fit under the slope of the ceiling - a tall order, as it turns out! :)

Still to come:  replacing the overhead light fixture, a little window dressing, and a small chair, perhaps?

Friday, January 15, 2010

Organization Makes Me Giddy

There's one room in my house that I end up spending most of my time in, and I'm pretty sure I haven't posted any pictures of it yet (it's late, or I'd check). It's my studio, it's the largest bedroom upstairs, and if you're wondering what it is that I DO in there, have a look over yonder
<-------

Anyway, it's a work-in-progress (aren't they all!?), so I'm not ready to show off the whole thing yet, but I couldn't wait to show my latest bit of organizing/thrifting/DIY awesomeness. But first, let's get the 'Before' mess over with quickly, bandaid-style:


Ugh. Ok, that's all you're getting, and I insist you forget you ever saw that. My propensity for making (or attempting to make) practically everything, means I have A LOT of stuff. And up until recently, no place to put it all.


Now check this out! The two white bookshelves were an absolute SCORE from Kijiji (I showed up expecting to buy just one, it turned out that they had two after all, and I got the two of them for just the $15 I'd planned to pay for only one).


As a side note, for those of you in the US: do you have Kijiji? I only ever see Americans talk about Craigslist...

Anyway, they were in great shape, but since I'm apparently not one to be happy with plain white shelves, I lined the backs of them in this cool 'formica'-like stuff that looks like bamboo (formica=weird, I know. But it was relatively cheap, easy to work with, and I love the look of it!):

(and no, I don't typically store placemats and stemware in my studio. I use these random objects as photo props, and my business cards are just in the glass because I think they look cool)


The fun stripe-y pegboard is super functional, but it's also practical: shelves all the way along that wall would've made for a tight squeeze trying to walk around my extra large work surface that's almost as wide as the room. This way I still get the storage, but it doesn't take up any floor space. (The stripes weren't for function, though. Just like the bamboo stuff lining the shelves, they're there because I think they make it more interesting, and because I can't leave well enough alone.)

Anyway, that's it for now. Maybe next time I'll show you how I store my ridiculous fabric stash. :)
Wednesday, December 23, 2009

Decking the Halls

Sorry for going AWOL for a while there, but work on the house has had to be put on hold for a bit in the lead up to the holidays. I've spent most of the past few weeks in my studio doing my Christmas 'making' (definitely not to be confused with Christmas baking) - both gifts to give and several custom sewing orders for others to give to their family and friends. One upside(?) is that it's given me lots of time to think about all the changes I want to make to that room, so watch for that in the new year!

Anyway, for now I thought I'd share a few pics of how I've decorated for my first Christmas in the house...

I got my craft on one day and made some mod paper ornaments to hang in the front window. (An idea borrowed from here.)


Inspired by this, here's a wreath I made as a gift for someone. Someone I don't think reads this blog. I guess we'll see! :) I love it, and am tempted to keep it for myself, but I'll just have to make another one when I have a bit more free time!


In lieu of the traditional garland on my very narrow staircase, I opted for a simple ribbon:


And finally, the tree. Due to general busy-ness and the as yet un-organized/un-decorated state of my living room, I contemplated not putting it up this year. But I'm glad I did - nothing beats the light of a Christmas tree! (big thanks to mish (the ribbon guru) for all of her tree-decorating assistance - ribbon-related and otherwise!).


And a special gift from these guys to commemorate this milestone, which I thought was very, very sweet of them :)


(reads: First Christmas in the New Home, 2009)

Happy Holidays!

Tuesday, August 4, 2009

Cuts Like a Knife

Here's a crafty 'problem-solver' that I can't take any credit for at all. It's all over the internet, with pricey designer versions here, here, and variations well, everywhere... and tutorials to make it yourself here and here.

The 'problem' was that I had more knives than I had slots in my knife block. It happens, right? Well this DIY knife block has no 'slots', so it can accomodate as many knives as I want!

I found a stylin' bamboo box at Value Village for $2 (I seem to be doing well there lately!), and stocked up on a few packages of bamboo skewers from the dollar store.

After a fair bit of trimming, here's what I ended up with:


Not too shabby, eh?! A designer look for a fraction of the cost. That's my kind of craft project!